Note: This article is under development; I
have only barely begun experimentation but I wanted to share my findings as I
made them.
Please do not take anything I say on this page as gospel. I do
not speak Japanese, I am speaking only in terms of how my
experience so far has been. So if I say "you can't configure an HDD without
a special utility," that means that I haven't found a way, not that it isn't
doable. If you have corrections, email them to me if you don't mind.
Preamble
Quick Start - Play a
Game
Booting DOS and TownsOS
Booting from floppies
Fixing keyboard input
Running OSes
DOS
TownsOS 1.1
TownsOS 2.1
Booting from HDDs
Emulator Tips
User Disks
Important CD Info
Recommended Games
Windows, Etc.
Troubleshooting
Appendix A: CMOS Config
Appendix B: TownsOS 2.1 Instructions
The FM Towns is a somewhat strange 1980s Japanese computer with a number of interesting games, many available on other contemporary systems, but at higher quality for the time, particularly arcade titles. It also has an intriguing, unique GUI available, though I'm not sure how much software was made for it.
It's actually a 386 PC under the hood (it runs MS-DOS! and Windows 95! although not in emulation) but it was equipped with some unusually high-spec hardware for the time. It never made it to the US market, naturally. I think there's something like a couple hundred games for it. This kind of thing (a "proprietary PC") was extremely rare and intrinsically interesting if you ask me.
As far as I can tell the only emulator anyone uses is Unz. There are several others that are abandoned and useless, and one that's extremely new (July 2020) and limited. Unz is fairly capable, so I will explain here how to use it. Fortunately the UI is in English, but that's only half the battle - you then have to understand what the Towns wants, how it works, and what's actually inside the disk images you're working with.
The documentation I have found in English on how to use it has been pretty much useless to me, and almost all of it is either forum posts or terse Youtube videos, so here I will share how I have done it. This is based on experimentation and machine translations, backed up with trial and error. I will assume you nominally know how to use videogame console emulators, since some of that knowledge will transfer.
I am not an expert. I learned 90% of this in one day of fiddling. If you find something I am very wrong about, please let me know, but do remember the stakes are not high here.
Important note: Virtually everything in the settings dialog requires a restart of the emulator! Don't forget this!
You can be up and running in less than ten minutes by following this guide.
Almost every game comes as a CD, so this should get you going for almost everything, but note that some games will start into TownsOS - if you end up at a weird Mac-ish interface, read the rest of this doc to understand what to do!
Let's start by launching a game - we'll use After Burner III. Follow these steps to the letter or you'll have weird problems!
You can now start Unz.exe.
Important note: If you've never started the
emulator before, you'll get a welcome message and be taken straight to the settings.
Just proceed with the config steps below, because when you hit OK for the first
time, the entire program will close anyway, so you might as well get the config
done now.
When you start the emulator normally, you should see this.
When you see this screen, with a series of icons appearing in the lower right
(CD, floppy, hard drive,) the machine is trying to find something to boot from.
It'll cycle here indefinitely until it finds something.
If you inserted a floppy right now, for instance, it would boot to it after a
few seconds - but we need to enable the CDROM to play our game.
Go to Settings > Property, then to the CD-ROM1 tab:
Set it up as shown, with the letter you mounted the image to. Don't leave yet or you'll have no music!
Go to the Sound tab:
Enable MIDI (you'll usually be picking the Microsoft GS etc. device,) select FMT-401, and enable 16bit PCM. Don't leave yet or you'll have no controls!
Go to the Input tab:
Most games expect you to use a gamepad, not the keyboard. The default setting here is "Key emulation" which will make your keyboard act as a gamepad - it also disables several of your keys!
Now you're ready to go - completely close and reopen the emulator. It will not work if you don't do this!
Once the emulator starts, just wait for a while at the boot screen until you
see this:

A clock means it found the CD and is booting into the game.
If something went wrong, it'll just keep looping indefinitely here. Go over the
steps a second time, check that your image is mounted, and restart the emulator.
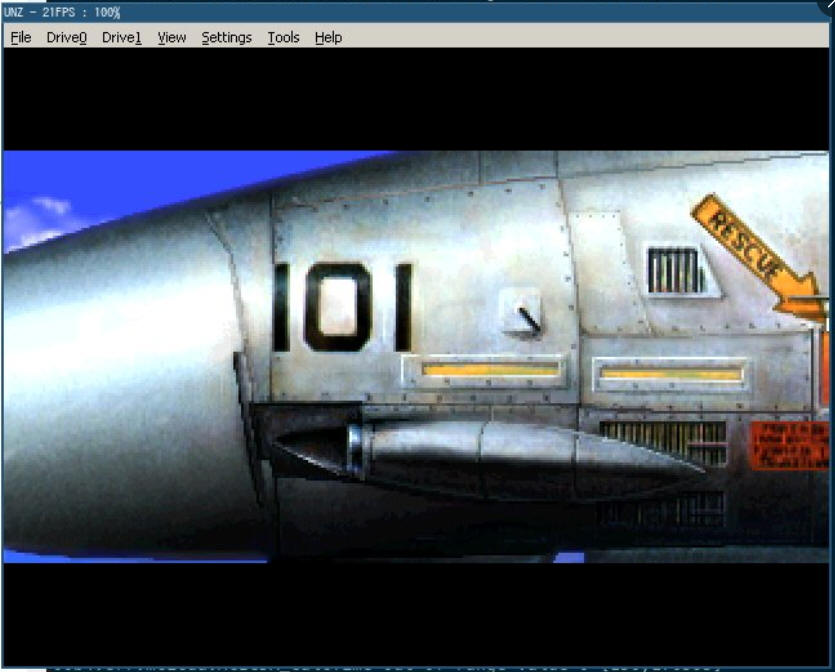
If all goes well you should get the game title sequence, which should include CD music with a voiceover.
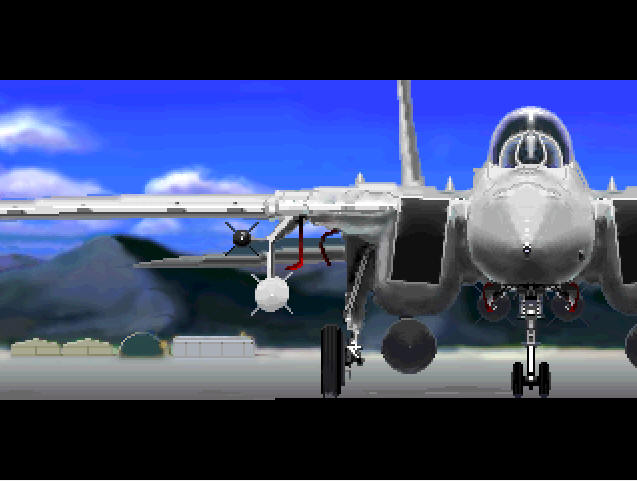
Press a gamepad button to start playing the game!
When you're ready to play another game, take note of the advice in the section below about CDs or you will have a very bad time!
The FM Towns has several OSes available. It seems to me that the primary OS is MS-DOS, usually 3.10, and TownsOS is some software running on top of that. DOS 6.2 is also available, and includes a better CMOS setup utility you may find useful, but TownsOS 2.1 has an even better one.
DOS and TownsOS 1.1 are available as floppy images. TownsOS 2.1 seems to be too big for a floppy (it's much more sophisticated) and requires a CD - you can boot into it just like a game, but it's also available more conveniently as a hard disk image, and in another section I'll explain how to get that working.
Towns floppy images are .HDM files. The BIOS pack I made contains DOS, TownsOS 1.1 which boots to a GUI, and a boot disk for TownsOS 2.1 that just boots to DOS, which I include because it contains CDROM drivers.
To boot a floppy, simply go to the Drive0 menu, select Insert... and pick a floppy image.
It's normal to get this error right away, it's a bug as far as I can tell. You can hit either button to proceed, it doesn't matter. The file dialog will then open, and you can pick a floppy image.
If, after clearing this error, you instead type in the name of a file that actually doesn't exist and hit Open, you'll get the same dialog again, and at that point clicking Yes will in fact create a new, blank floppy image, formatted if you so choose.
Once you've selected a disk image, reset (if you aren't at the boot screen) and you should boot right into it. Disks load in realtime as far as I can tell, not accelerated.
The DOS and TownsOS 2.1 images will boot to a command prompt, where you'll find quickly that your keyboard doesn't work right when you try to enter text.
First, make sure you disabled joystick emulation in the Input section, otherwise you'll be missing several keys including Z, X, and arrows. If you've done that already, then you probably still need to rebind some things. Letters will work fine off the bat, but several symbols will not work due to layout differences.
The first is the backslash, and this cannot be fixed - there is no backslash on any Japanese computer of this era. The yen sign is used instead, e.g. A:¥DOS¥TOOLS - and your keyboard has no yen sign, so you'll need to assign that key. I also found that colon and pipe were not available and needed to be bound.
The rebind interface is a little weird. Access it through Settings > Property on the Keyboard tab:
Click Change key configuration to view bindings, and locate the yen, as above. You have to double click specifically on the 0x0e part. Type the key to bind to, hit OK, and you're done.
Now you can type yen with the backslash key. You can also now type pipe, since those are both on the same key. I suggest you bind the colon to your semicolon key. You can move on at this point if you like, but here's why I said that, if you're curious:
If you look at a picture of a Towns keyboard (very good one found here), you'll find out that there are 3-4 characters on every key, and multiple shift keys to access them all - and not just for accessing Japanese characters like you might hope. The layout is significantly altered from a US keyboard, so that for instance, semicolon and colon are not on the same key at all. So if your semicolon key on your real keyboard was bound to semicolon here, then you'd have to bind something else to colon. I feel that the best solution here is to bind the colon to the semicolon key so you'll be done with it.
For most purposes you'll be good to go at this point, since you can now enter full paths at the command line. If you're doing more serious text entry on this machine, well, good luck figuring out how those other shift keys work, I don't know yet.
DOS can be useful for some purposes, but to get the full Towns experience you should probably try TownsOS. Here's some info on each.
DOS pretty much works like DOS on the PC. It might be kind of hard to figure out where disks are mounted, but it's often something like this:
Just like PC DOS, you can run anything that's an EXE, COM or BAT. EXP files are executables, but they can only be run from TownsOS.
DOS disks include a CMOS setup utility which is necessary in some cases to configure hard drives among other things. DOS 3.1 includes SETUP, and DOS 6.2 includes the much improved SETUP2. I'll go over this in a later section, but you might as well use the TownsOS 2.1 GUI version, it's easier.
The copy of TownsOS 1.1 that I included in the ROM file above will boot from floppy, so you can use that if you're having trouble with the CDROM. Otherwise, there's a CD version that should be in the redump collection which you can boot into if you have the CD working. It includes a lot more utilities, software, etc. to play with.
As far as I can tell, TownsOS is the GUI, and TownsMENU is the shell.
You can launch non-bootable CDROM games from here, or run TownsOS apps (.EXP files.) You're limited to this single file browser which is always present, with all available disks displayed as tabs. More on how that browser works in a moment, first a note about the mouse.
The mouse doesn't focus like most PC emulators by default - to "grab" the mouse pointer, roll your mouse wheel up, and to "ungrab" it, roll down. You can change this in Settings > Property under Misc, in the Mouse capturing by section.
Now, if you look at the screenshot above, you might think, "that sure looks like a small number of files for a whole CD," and you'd be right. TownsOS has two view modes, "files" and "items." The latter is sort of a "friendly" view of a folder, generated by entries in the TMENU.INF file in the root of the disk.
This is like how Mac software is distributed as a single, shiny file on a disc that you just click on, rather than exposing the hundreds of underlying files that make the software work. The files are there, however, and you can view them by clicking the button in the upper left to toggle to Files view (a floppy disk icon,) at which point you'll see everything on the disc. For most media, you'll see nothing at all unless you do this.
Otherwise, just play around - double click on things to start them, the usual.
These are the File and Disk menus, and the contents are as follows:
File: Run, Copy, Rename, Make Directory, Change Directory, Delete, Edit Item, File listing display settings.
Disk: Format, Copy Disk, Set Label, Check Capacity
TownsOS 2.1 is an entirely different beast, with a complete windowing system and a lot more sophistication. You can launch it from CD or HDD (explained in a later section.)
This is usually how it launches, with the list of available drives and the boot drive open. If you lose the disk list, you can click the floppy in the upper right to reopen it.
The upper left button closes windows. The upper right is the window context menu, which is very important. Typically there will be three options.

The top three items in the window menu are always Refresh, Files/Items, Tree, the results of which you can see in the second screenshot. Items / Files works as it did in TownsOS 1.1, so you'll usually want Files. The Tree view will show you every folder on the disk, but no files.
There are many options in the various system menus, which I am slowly interpreting via machine translation and experimentation. I may put a rubric up here later.
HDD images are .H0, H1, H2, H3, H4 files. I'm not super clear on whether the extension matters - I assume it's just for organization?
You can create an HDD image or use one that's been prerolled. At the moment I recommend you use a prerolled one (there are HDD images with installed OSes included in the NeoKobe collection) but either way, first you need to configure the emulated Towns to understand that it has a hard drive attached.
First, let's mount an image, from Settings > Property in the HDD tab:
Remember to close and reopen the emulator after doing this.
Now let's configure the Towns. The HDD is a CMOS setting, and the Towns has no CMOS utility built in, so you'll need to fix this.
Some hard drive images that you find in a ROM archive (like the NeoKobe set) include a cmos.dat which you can use to overwrite the one in the Unz directory. This should get you up and running directly, but I don't know if it has any side effects. It's probably the easiest approach.
If this doesn't work or you don't want to do it, skip to the section on CMOS configuration. It will explain how to configure a hard drive. Once a drive is configured as present, it should be bootable.
A note on boot order: It seems to be fairly rigid, but sometimes it just doesn't do what it's supposed to do and I don't know why. The best advice I can give is that the best way to get the machine to boot to the disk you want is to make sure it's the only disk available to boot from. Eject the CD if you want to boot from floppy, for instance.
By default the boot order seems to be Floppy > CDROM > HDD, but sometimes it just acts weird. If you pick a boot device from CMOS setup, it does seem to put it at the top of the boot order, but will still attempt to boot from everything else afterward in the same order.
The emulator menu File > Key+Reset provides a bunch of options to reset the system while holding down certain keys - for instance, "F0+Reset" should force the machine to reset and boot from the first floppy drive, and "H0+Reset" the same. You should see a symbol like this when the machine reboots:

If you don't see this, congratulations! You found yet another way in which
Unz can silently get stuck in a weird state where it doesn't do things right.
What's your prize? The same as always: close and reopen Unz!
Notably, this will not remove the need to configure an HDD to boot from it, and in fact you'll get a blank screen with this error if you connect an HDD image, but don't configure it:
![]()
Just a few things I recommend:
Above all else: restart the emulator. Close it, and open it again. Given the choice, never don't restart the emulator. Don't just use the reset option in the menu, close and reopen Unz. Restart the emulator after basically every action.
If you run a program, and then you intend to run another, restart the emulator first. There are tons and tons of reasons to restart the emulator.
Resetting from the menu doesn't really reset - it leaves junk in memory and weird stuff happens. The video gets corrupted. Hardware doesn't get reset properly. The CDROM doesn't get released and remounted correctly. Keyboard keys will stop working, games fail to play some audio tracks, you name it, everything can go wrong.
Games that are capable of saving may request a User disk. You'll usually know this is happening because a CD game is asking you to put something in the A drive (notice the latin letter A in this message) or Drive 0 (you'll see a 0 hanging out in the message somewhere.)
A user disk is usually just a blank disk, which you can create by going to Drive0, selecting Insert... and entering the name of a nonexistent disk image. When it prompts you to create a disk, click Yes.
The default size should be fine, and pick "MS-DOS formatted" to format it. Once you do this the game should accept it right away.
It is crucial that you be very careful and deliberate in how you interact with the virtual CD-ROM. If you do anything to break Unz's "handle" on the drive, weird stuff will happen.
A very good practice is to just close the emulator every time you change CDs. Here's why:
First, you'll break CD audio playback for sure. As far as I can tell, changing CDs always breaks CD audio until you close and reopen the emulator - it'll still load games, it just won't play music (so if you have no music in a game, restart Unz and try again.)
But it gets worse if you try to change discs without ejecting within the emulator. If you try this, you'll probably get this kind of message from your virtual CD program:
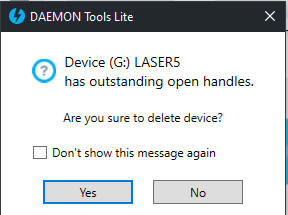
Do not click Yes to this. Instead, eject the disc from the emulator by going to File > CD > Eject. Only then can you mount a new image.
Otherwise, Unz will refuse to read the CD again until you restart the emulator. But it gets weirder - if you do click Yes on this prompt, the virtual CD program will fail to remount the drive. You then have to close the emulator and recreate the drive. Do this a few times and (at least with D-Tools) it will freak out and complain about not having enough "resources," at which point you need to reboot your entire computer.
Even if you do this, CD audio will still break, so just restart the emulator every time. It's worth it!
Obviously once you get the machine working you might want to play a video game or two. Of course with any Japanese domestic market game you're going to have language issues if you don't read Japanese, but some games will have sufficient English to make it through, and others you can possibly translate on the fly with e.g. Google Translate on a smartphone enough to get by.
Naturally, arcade ports are more likely to be playable by English speakers. I haven't been through the entire library, but I'll add any accessible titles I've tested here:
I was hoping to be able to run Windows 3.1 and 95 on this system, but couldn't get them to go because the XMS driver wouldn't load. While researching this I came across a forum thread which asserted quite strongly that this will never work because Unz is not a "clean" emulator, but is actually a huge pile of hacks to get specific software (TownsOS and games) working.
This scans, honestly, and given that the author dropped off the face of the planet in 2011, it's unlikely to change, and that probably means that other OSes - such as the Linux that apparently exists - also will never work.
"I'm playing a game just fine, I have sound effects, but no music."
Lots of things can cause this!
Did you turn on Enable 16bit PCM in the Sound control panel?
Make sure you actually test the music properly. Lots of games seem to have no music at the menu even though you'd really expect that. Look for a MUSIC TEST option, or just start the game proper and make sure it actually isnt working.
Make sure you have MIDI enabled and set to a valid output ("Microsoft GS Wavetable SW Synth", if you're unsure)
Restart the emulator. Certain things can get CD playback stuck so that the emulator can play a game, but can't play the audio. Restarting will fix it.
Finally, make sure you have a good ISO. Some NeoKobe dumps seem to have broken music tracks.
"No matter what I do, I can't get the music to pause, even when I'm in the settings dialog."
CD audio playback appears to be unpausable. I think maybe it's being played in your host OS instead of through the emulator. Once the emulator sends the command to start playing audio, the only way to stop it is to quit Unz.
"I can't type Z or X."
Did you disable keyboard joystick emulation in the Input control panel?
"This game is running too slowly."
Try increasing the clock speed from the Settings menu. I had to bump it to 40MHz before Alone in the Dark would move smoothly, and even then it has some substantial slowdown in places.
"This game just crashes on startup."
There's lots of reasons for this, including a bad CD rip (Alone in the Dark from the NeoKobe collection does this; the redump is fine) or, apparently, CPU incompatibility (AitD also crashes if you're on a 486.)
"The game won't start, it's giving me a message I can't make any sense of, I don't have Google Translate or the translation makes no sense..."
Try putting a formatted blank disk image in Drive0. The game might be asking for a user disk.
"There's an awful beeping noise coming from the emulator! It's kind of scratchy and high pitched?"
If you alt-tabbed out (or hit a few other key combos), you now have Tab stuck down in the emulator and it's beeping because the keyboard buffer is full. Tap the Tab key to un-stick. Also try Alt, Ctrl, and other likely keys.
"I have another problem..."
Restart the emulator. Restart it again. Restart the emulator a third time. Close Unz and reopen Unz.
There are several ways to configure the CMOS:
I don't have the time to translate the entire config system, but here's how to enable a hard drive if you don't want to use someone elses cmos.dat.
Even if you're just gaming, you might need to understand how the Towns manages disks, because some games need to be installed to the HDD.
The Towns does not autodetect partitions. There are two steps to configuring a drive: First, telling the BIOS that it's physically present, and second, telling it to look for a partition.
The prerolled HDD image included with the NeoKobe copy of TownsOS 2.1 (the 300MB one) has three partitions, but if you follow my instructions below you'll only enable the first one, which doesn't have enough space to install any games.
To enable the rest, you have to repeat the "Add a disk" step two more times, then reboot, at which point the three partitions will appear as D, E and F.
You can do pretty much everything from TownsOS 2.1 in graphical form, so I recommend you use it. Boot into it from a CD image and open the fourth menu, Settings:
That's "Boot Select," "Disk Management" and "Partition Editor." Click Disk Management.
This is the list of every drive the machine is capable of using. If a disk is configured, the assigned drive letter appears to the upper right. The right column is all hard drives.
Click on the first HDD, where my mouse cursor is (it won't have a letter).
In the popup, select the first option (that's "Add a disk"; the second one is "Remove a disk") and click OK (the left button.) Repeat this multiple times if the drive has multiple partitions (example result shown above.)
Now click OK on the disk manager window.
You're done. The machine will now boot to HDD. If you want to force the HDD to boot first, open Boot Select and select it (the one my mouse cursor is over.)
If you've created a blank HDD image and want to partition it, you could use the partition editor:
Use the arrows to select the disk, then click the disk itself to load the disk info.
Click on a text field to create a partition - the process after that is pretty self-explanatory even with no translation. To make a partition bootable, click the circular radio button next to it (the ones you can see in the above image.)
Click OK (the left button) when done to write changes.
If you can't or don't want to use TownsOS 2.1, maybe because you can't get the CD to boot, you can do it from DOS. To launch the utility, just boot from a DOS disk and enter SETUP2.
 |
The options here (clockwise from upper left):
|
You'll want Disk Management.
 |
On the top are all your possible drive locations Lower left is hard disks Lower right is boot device select Arrow over to D: and press enter. Select the second item from the list (hard disk) and then pick disk 0. At this point you can press F3 a couple times to exit to DOS, reboot, and you should be able to boot from HDD. |
You could partition a disk at this stage but honestly I think it's easier in the graphical TownsOS one so I'm not going to take the time to translate it. Here's the very cool looking partition editor though.
Here's just some things I've happened to work out with Google translate plus experimentation.
I should note that if you hit the Help button at any time you'll get contex sensitive help which seems to be quite high quality. If you read Japanese, or use Google Translate on a smartphone, you can get quite a lot out of this I think.
There are several versions of TownsOS 2.1 (called "Levels") with significant differences. The instructions I give here are for L51. I've found some games boot into older versions where things behave differently, so pay attention to whether you're booted from the version of the OS you think you are.
The Alone in the Dark disc, for instance, boots to L20 where it has zombie icons for its Items, but when you read the disc while booted to L51 they don't show up. Maybe L51 changed icon support, or maybe this has something to do with being booted from the media that contains the icon.
If you want to create your own Items (sorta like shortcuts, in Windows parlance) it's not too hard.
First, you need a file browser open in Item mode. This is the default state.
Next, go to the File menu and pick Item > Create/Edit:

The fields here are Path, Filename, Item Title and Parameters. I've noticed that on Towns, shortcut paths usually begin with a yen, sort of like how Unix paths can begin with a slash to say 'root.'
The options on the right are, from top to bottom:
Remember also that you can change the icon by clicking the current icon on the left side (bottom button.)

This is, in order: Towns menu (like the Apple menu), File, Disk, Settings, and then the buttons are List Disks, On-Screen Keyboard, Help, Power.
 |
Towns menu:
|
 |
File menu. Remember most of these won't work unless you're in File view, not Item view.
|
 |
Disk menu. Be careful here.
|
 |
Settings menu. Plenty to do here - I believe this is a full replacement for the DOS CMOS config utility.
|
Yes, there's a complete partition editor built into the OS.
Here's roughly what's in the root of the TownsOS 2.1 HDD image from NeoKobe:
 |
Clockwise from upper left:
|
These buttons mean Retry and Cancel. The message basically says "Not ready reading drive A:"
This is the "shut down" menu. The buttons are Reset, Power Off and Cancel. The options are "Save open windows" or "Don't do that." If you pick the former, everything will reopen when you power up again.
 |
List of running (?) tasks. Buttons along the bottom are:
|
I've been informed that Unz will run under Wine on Linux. I haven't tested this, but here are the rough steps:
If this was interesting to you, or if you did something interesting with it, email me: articles@gekk.info
If you like my work, consider tossing me a few bucks. It takes a lot of effort and payment helps me stay motivated.